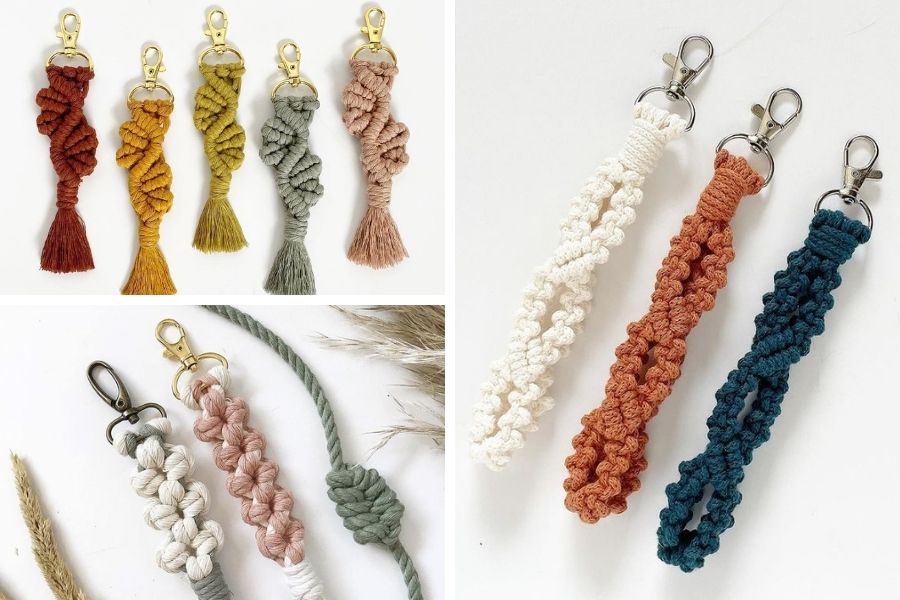
Macrame Keychains Diy – When most people think of macramé, they think of the kind with big, bulky knots on a square workbench. However, there are actually several different types of macramé, each with their own distinctive features and techniques.
One particular style that is becoming more and more popular is the type that involves making small keychains as an end product.
These keychains are known in the macramé world as “friendship bracelets” or “keychain macramé”. They’re quite easy to create, but like all crafts, you will need to practice making them before you feel comfortable enough to sell them to friends or family members!
How to Make Macrame Keychains: A Step-by-step Guide
Macrame keychains are so much more than just a fad. These knotted keychains are making a comeback and are bound to stick around for good reason.
They’re cool, they provide an excellent opportunity to master macramé skills, and they can be made in any color, size, and pattern you like. We’ve all seen those intricate lanyard keychains with beads and pendants hanging from them. But have you ever stopped to think about how exactly those were made?
It seems complicated enough that it must require some sort of special technique. Well, you’d be right! That technique is called macramé. That’s why we’ve prepared this step-by-step guide on how to make macrame keychains like the ones you see everywhere these days.
What is Macrame?
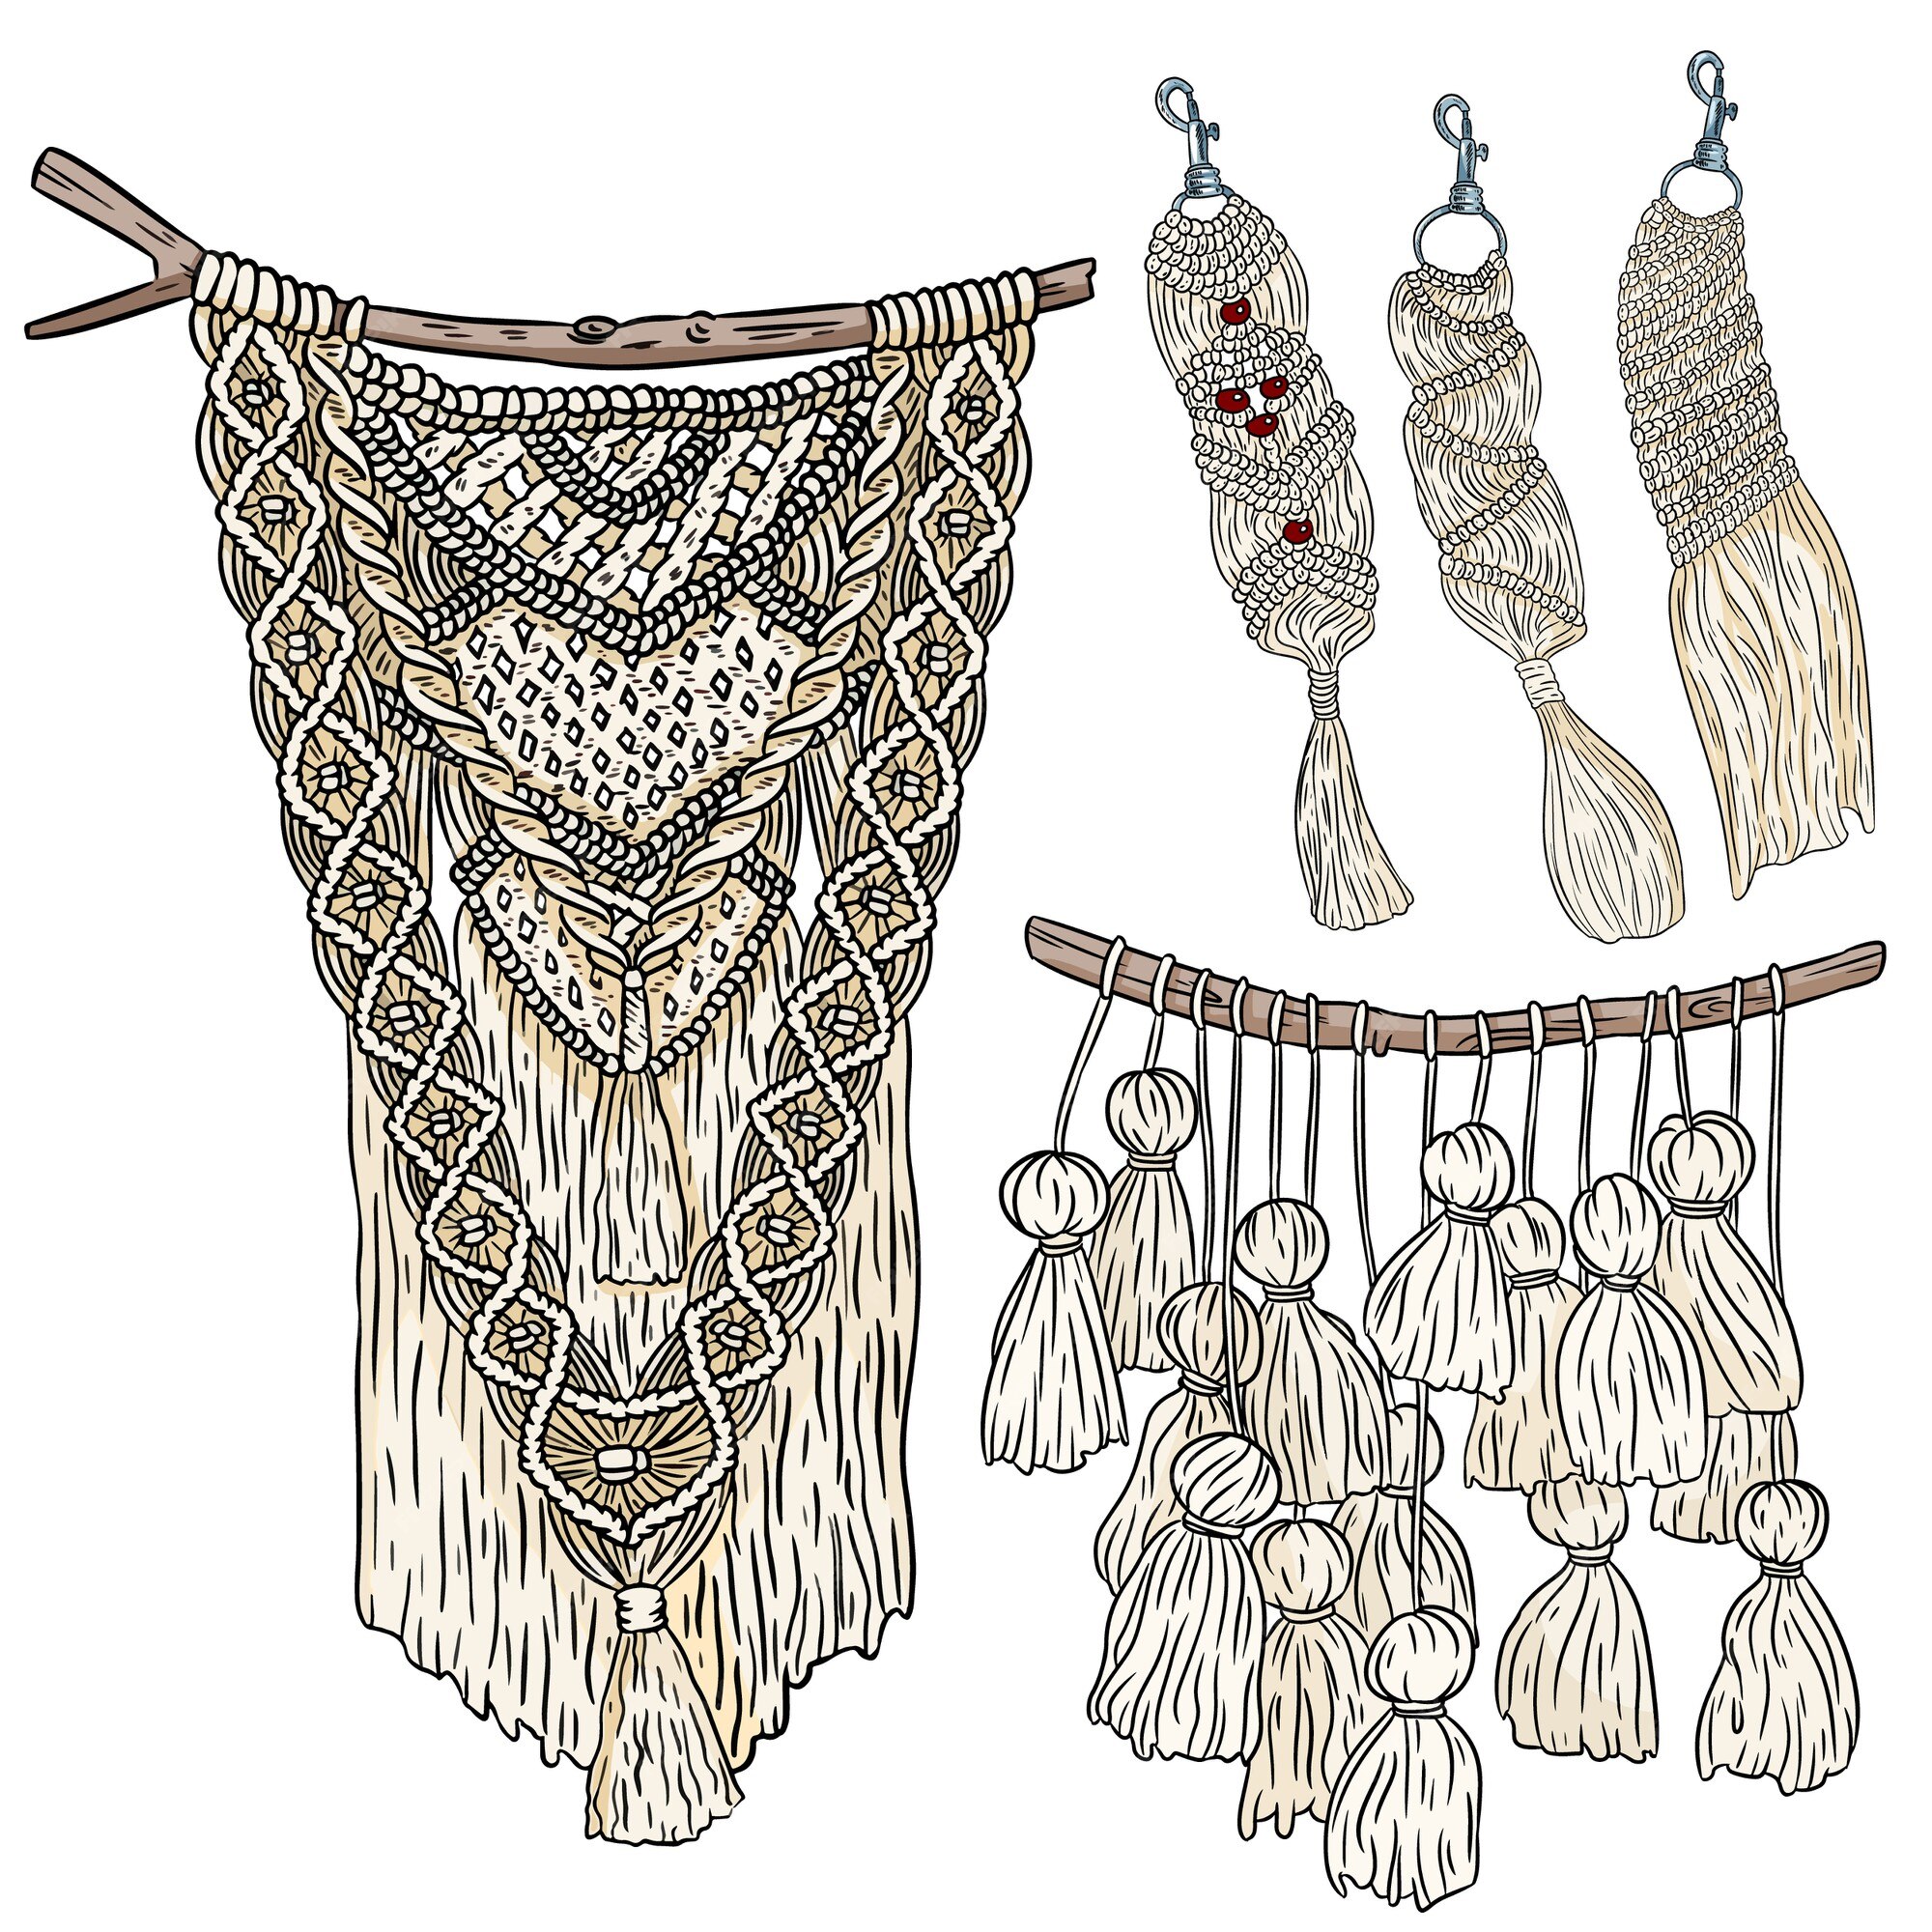
Macramé is a textile craft that involves knotting one or multiple strands of fabric or other material such as cord, hemp, or ribbon. Macramé is sometimes used as a synonym for knotting, particularly in British English.
In other contexts, macramé describes a specific technique that employs a decorative knotting method to create texture and pattern.
Macramé is generally associated with a particular aesthetic, and is often used to create wall art, decorative items, jewellery, and other decorative crafts. Macramé is also commonly used to make plant holders, holders for candles and other small items, and other household decorations.
What do you need for macrame keychain?
Equipment You’ll Need
– A piece of strong, durable fabric (preferably cotton) – around 30cm x 30cm (12” x 12”) is enough for one keychain. – 2 pieces of cord, hemp, or a length of leather around 40cm (16”) long each. – Scissors or a cutter – A measuring tape – An old pencil or a pen
Tools and Supplies You’ll Need
But before you can get started, you’ll need to gather your supplies. Here’s what you will need:
- Key ring
- 3x 4mm single twist cotton cords (32″ long)
- Sellotape
- Scissors
- Beads
- Embroidery thread
- Hair comb
How to make a Macrame Keychain?
Macrame keychains are so much more than just a fad. These knotted keychains are making a comeback and are bound to stick around for good reason.
They’re cool, they provide an excellent opportunity to master macramé skills, and they can be made in any color, size, and pattern you like.
We’ve all seen those intricate lanyard keychains with beads and pendants hanging from them.
But have you ever stopped to think about how exactly those were made? It seems complicated enough that it must require some sort of special technique. Well, you’d be right! That technique is called macramé.
That’s why we’ve prepared this step-by-step guide on how to make macrame keychains like the ones you see everywhere these days.
Macrame keychains are super easy to make and the perfect project for leftover cord scraps. If you’re looking for more gorgeous colorful Macrame cords, make sure to check out Soulful Notions amazing Etsy shop or take a look at our list with local Macrame cord suppliers!
Step 1: Find Your Colour Sequence
First, you’ll need to decide which colours you want to use. You can follow the pattern of your favourite sports team, a flag, or maybe even a rainbow. The important thing is to choose colours that work well together. If you’re not sure what colours to use, don’t worry. There are plenty of colour combinations you can use for macramé, and you’re bound to find one that you like.
Step 2: Mark Your Shapes and Lengths
After you’ve chosen your colours, you’ll need to determine how many strands you want to use for each section of your keychain. The width of the cord will determine how wide each section of your keychain looks. The distance between each section is determined by the length of your strands.
Take the length of your strands and subtract from it 1/2 inch (1 centimeter) to account for the thickness of the knots. For example, if you want to use 10-foot-long strands, you should space your sections 9 inches (23 centimeters) apart.
Now take your strands and decide on the order in which you’ll use them to create each section of your keychain.
– For example, you might decide that you want your first section to be made of red, blue, and yellow strands.
– Then you might want to use the remaining strands in the following order: blue, yellow, red, yellow, blue, red, yellow, blue.
Step 3: Begin Knotting
Once you’ve decided how you want your keychain to look, it’s time for the fun part – knotting! The first section of your keychain is the easiest. It’s best to start with the thickest cord you’re using, in this case, it would be your red strand.
– Create a simple overhand knot, wrapping the red cord around the blue and yellow strands.
– Finish by tucking the ends of each cord inside the knot. Make sure the strands are even with each other, and the thickness of the knot is consistent throughout.
– Repeat this step for the remaining sections of your keychain.
Step 4: Finish Up and Trim your Keychain
Once you’ve finished knotting your keychain, you can start to trim the excess. You can do this by cutting off any loose ends, or you can start to trim the edges of your keychain with a pair of scissors or a cutter. If you want a cleaner look, you can bind the edges of your keychain with more cord.
To do this, just take a new strand of cord, and wrap it around the edges of your keychain. Once you’ve finished binding your keychain, you can use it to store all your important items, or you can add a pendant and make it into a stylish and decorative piece of wall art.
Conclusion
Now that you’ve followed this step-by-step guide on how to make macrame keychains, you can finish your creation, and show it off to everyone. These keychains are a great way of personalizing your bags, backpacks, and even your keys.
They can be used as a conversation starter, and they are a great way of repurposing materials you might have lying around your house. What’s more, macrame is a great way to relax and unwind, and it’s a fantastic hobby for teens, students, and even grown-ups. It’s a great way to unwind after a long day, and it’s fun, too!